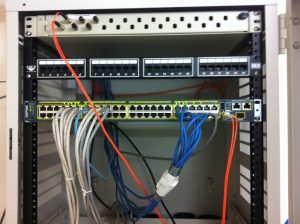
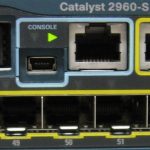
The Cisco IOS (Internetwork Operating System) is a robust platform that provides a high level of reliable performance within most network infrastructures. Like most software, the IOS requires updates to resolve security issues, defects and also to add additional features. Updating the IOS on a Cisco 2960 is a straightforward procedure when connected to the Cisco 2960 command line interface (CLI) using a serial console cable.
Things You’ll Need
- Microsoft Windows 7 computer with 9 pin serial port, TFTP service installed, and connected to the same network as the Cisco 2960
- Microsoft HyperTerminal install on the Windows 7 computer
- Cisco serial console cable

- Cisco IOS image stored in the root directory of the TFTP service application
- IP address of the Microsoft Windows 7 computer
- Privilege Exec mode password for the Cisco Catalyst 2960 switch
Instructions to Upgrade a Cisco 2960 IOS With a Console Cable
1. Attach one end of the Cisco serial console cable to the 9-pin serial port on the Windows 7 computer. Attach the other end of the Cisco serial console cable to the Cisco 2960 serial console port.
2. Select the “Globe” start button on the Windows 7 computer, then select “Computer” and then navigate to the location where the Hyperterminal application files are stored. Double-click on the “hypertrm.exe” file. The “HyperTerminal” program will appears.
3. Enter a name for the connection in the “Name:” field presented in the Hyperterminal window that appears, and then tap the “Enter” key. Select “Connect using:” and then choose the “Com port” in the drop down list, that is being used to connect the Windows 7 computer to the Cisco 2960, and then tap the “Enter” key.
4. Select the “Bits per second:” drop-down box, and then choose the “9600” setting from the list that appears. Select the “Flow Control” drop down menu, and choose the “None” setting in the list that appears. Tap the “Enter” key.
5. Touch the “Enter” key and the Cisco command line interface (CLI) appears.
6. Enter the “enable” command at the command prompt, and tap the “Enter” key. Enter the Privileged Exec password when requested, and then tap the “Enter” key.
7. Enter “archive download-sw /overwrite /reload tftp:// IOS-file-name.tar” on the command prompt, substituting the “IOS-file-name.tar ” with the actual name of the IOS update image file that is stored in the root directory of the TFTP service on the Windows 7 computer. Tap the “Enter” key to execute the command.. The new IOS image copies to the Cisco 2960. After the IOS image file has been transferred to the Cisco 2960, the switch automatically reboots and starts running the new IOS image.
References
Cisco: Release Notes for the Catalyst 2960 Switches, Cisco IOS Release 12.2(25)FX
CISCO: Catalyst 2960 Switch Software Configuration Guide


