
Is it possible to convert Air Cap 3502i access point to the standalone mode? How to convert a CAPWAP-based Cisco 3502i Access Point to operate in an autonomous mode?
Generally, Cisco’s firmware on the device is designed to only work in managed mode, which requires a CAPWAP compatible appliance or server on the network.
However, if all that is needed is a single WAP on a network, frankly, an entire controller management network is not necessary. As such, this device can be converted back to an autonomous WAP by replacing the firmware with a previous generation’s version. In the following part, some Cisco users shared their experience of converting a Cisco 3502i AP to Operate in an Autonomous Mode. How to finish it? Let’s check…
What you need when converting a Cisco 3502i AP to Operate in an Autonomous Mode
- Cisco CAPWAP3502i Access point
- Cisco Console Cable
- Replacement Firmware: ap3g1-k9w7-tar.152-2.JB.tar
- TFTP Server
Before you can start working on the device, you need to ensure that there is a TFTP server on the network. Upload the firmware ap3g1-k9w7-tar.152-2.JB.tar to the device and make sure that you can access the file. This is how the device install firmware upgrades. If you don’t have the file, scour Cisco’s website for the image. It’s licensed software.
How to Convert a Cisco 3502i AP to Operate in an Autonomous Mode?
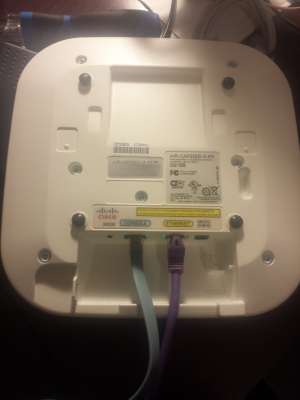
The first thing to do is connect to the console port of the WAP and connect via telnet into the device. This provides a direct interface to manage via RS232 serial.
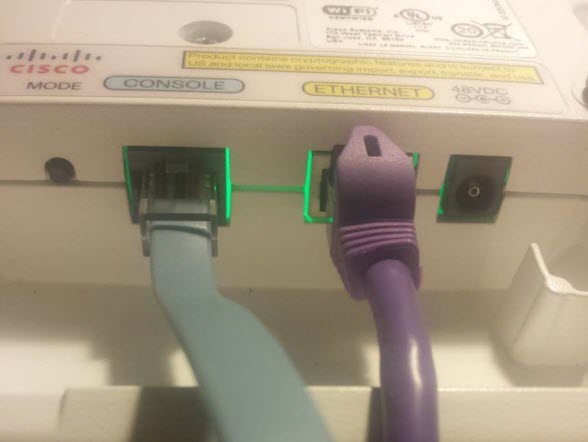
The blue cable above is a Cisco Console Cable RJ45-to-DB9, which is a roll-over Cat5e cable that terminates in a DB9 end. Since my laptop, nor many others, have a serial port anymore, I used a Plugable USB to RS-232 DB9 Serial Adapter (Prolific PL2303HX Rev D Chipset). This device is detected as a standard serial connection in Linux, so no messing around with drivers is needed.
Once connected up, start up minicom as root and configure it with the necessary baud rates and etc to listen over /dev/ttyUSB0. If done so correctly, powering on the WAP should present the device’s boot screen and autoconfig, (which won’t connect), in your telnet terminal.
If all is working well, remove power from the device and hold in the “Mode” button and reconnect power. You need to keep the button depressed for at least 30 seconds after the device boots in order for the bootrom to start. Alternatively, I believe pressing ESC as the device starts loading its kernel may work as well.
Once you have a terminal, (indicated by “AP:” on the screen), you can issue commands to the ROMMON.
set IP_ADDR 192.168.100.100
set NETMASK 255.255.255.0
set DEFAULT_ROUTER 192.168.100.1
tftp_init
ether_init
flash_init
tar -xtract tftp://192.168.100.2/ap3g1-k9w7-tar.152-2.JB.tar flash:
and WAIT! This flashing process will probably take a while, about 10-15 minutes or so. After the entire operation completes, issue the next set of commands to initialize the new firmware.
set BOOT flash:/ap3g1-k9w7-tar.152-2.JB/ap3g1-k9w7-tar.152-2.JB
set MANUAL_BOOT no
set
boot
More the user got: “I had to power cycle the device a time or two in order for the new firmware to take effect, but once it does, you should be able to switch to privileged mode with the default password of ‘Cisco’.”
This device is an enterprise-grade component; as such it supports Power Over Ethernet. Since this firmware is not centrally managed, it provides a web GUI for management. Load up the device’s IP in a web browser and use admin / Cisco to get started.
More Cisco Wireless AP Topics
Cisco AP 3600 vs. Aironet 3500 Series
Why You Should Upgrade with Cisco 802.11ac Solution?
How to Connect Cisco Wireless Access Point?

Expertise Builds Trust
20+ Years • 200+ Countries • 21500+ Customers/Projects
CCIE · JNCIE · NSE7 · ACDX · HPE Master ASE · Dell Server/AI Expert
