
How to set up your Cisco ASA with Firepower Services? It’s easy for you. There are big four steps tell you how to set up Cisco ASA with Firepower Services easily? Now, let’s check it step by step.
Big Four Steps:
Connecting PC to ASA
1. Before You Begin
Before you begin the installation, make sure that you have the following equipment:
- ASA Chassis
- AC Power Cable (& Supply with ASA 5506-X)
- Ethernet Cable x 3
- PC
Make sure that nothing is connected to the ASA and your PC settings are configured to use DHCP.
2. Connecting PC to ASA
Step1. Connect the AC power cable to the AC power connector of the ASA and a grounded AC outlet. The power turns on automatically when you plug in the power cable. There is no power button.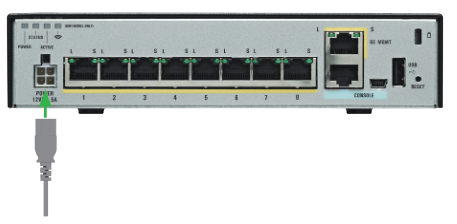 Step2. Confirm that the POWER LED and STATUS LED are solid green. If the POWER LED is solid green, the device is powered on. After the STATUS LED is solid green, the system has passed power-on diagnostics.
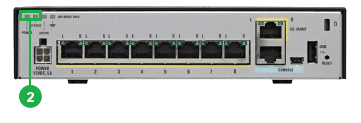 Step3. Connect the first Ethernet cable to the Ethernet port#1 of the ASA, and the other end of the cable to the Ethernet port of your WAN device. Wait until the port LEDs on the ASA and your WAN device are green or blinking green. Green LEDs indicate a successful connection.
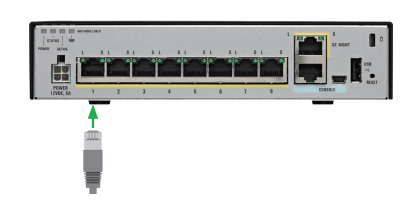 Step4. Connect the second Ethernet cable to the Ethernet port #2 of the ASA, and the other end of the cable to the Ethernet port of your PC. Wait until the port LEDs on the ASA and your PC are green or blinking green. Green LEDs indicate a successful connection

Caution: At step2, if the STATUS LED does not turn solid green, or turns amber, the ASA failed the power-on diagnostics, reconnect the AC power cable to the ASA AC power connector and a grounded AC outlet. Nevertheless the STATUS LED does not turn solid green, or turns amber, contact your Cisco representative or reseller.
At step3 & 4, the ASA port to connect an Ethernet cable is the RJ-45 Ethernet port, not the RJ-45 management port. The RJ-45 Ethernet ports are numbered.
…
More Related
Cisco ASA with Firepower Services, Setup Guide-Part1
Cisco ASA with Firepower Services, Setup Guide-Part2
Cisco ASA with Firepower Services, Setup Guide-Part3
Cisco ASA with Firepower Services, Setup Guide-Part4
How to Deploy the Cisco ASA FirePOWER Services in the Internet Edge, VPN Scenarios and Data Center?
Introducing Cisco Umbrella Roaming

Expertise Builds Trust
20+ Years • 200+ Countries • 21500+ Customers/Projects
CCIE · JNCIE · NSE7 · ACDX · HPE Master ASE · Dell Server/AI Expert
